Introduction
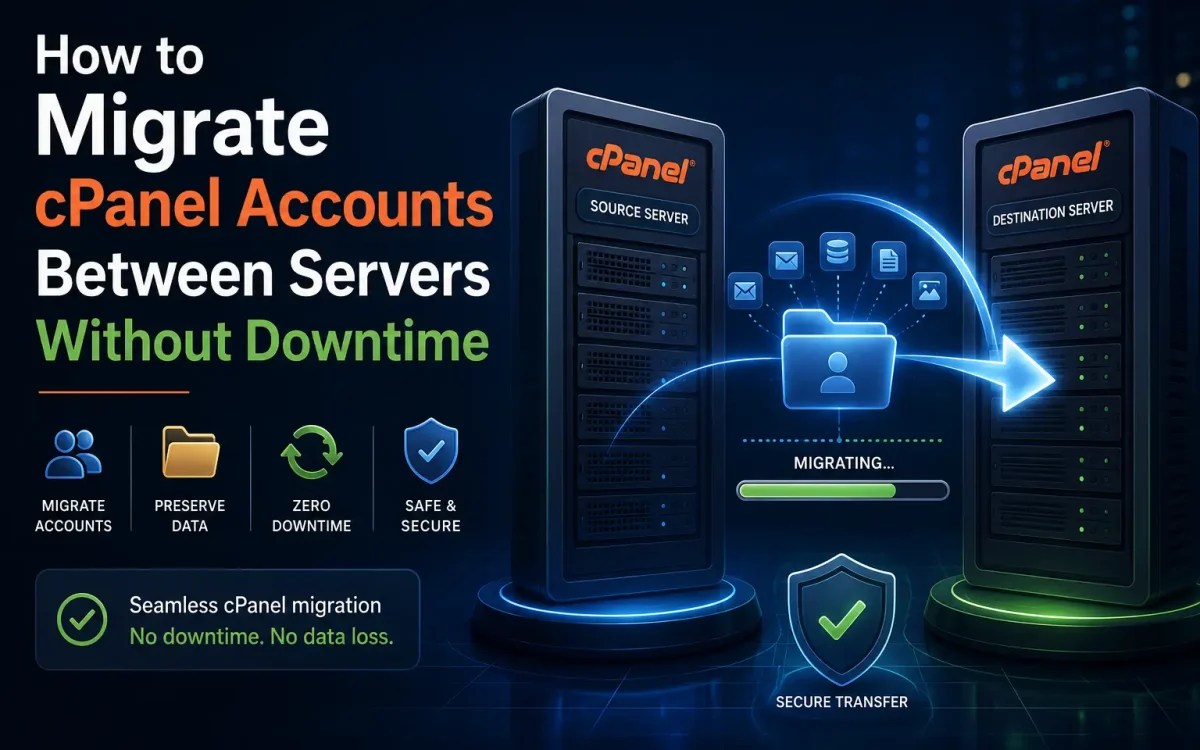
Migrating websites between servers is a critical task for hosting providers, businesses, developers, agencies, and website owners. Whether you’re upgrading to a faster VPS, moving to a dedicated server, changing hosting providers, or consolidating infrastructure, one concern always stands out: downtime. Even a few minutes of downtime can lead to lost sales, reduced customer trust, interrupted services, and potential SEO impacts. For eCommerce stores, SaaS platforms, business websites, and high-traffic applications, maintaining uninterrupted availability during migration is essential. Fortunately, cPanel provides powerful migration tools that make it possible to transfer entire hosting accounts—including websites, databases, emails, DNS zones, SSL certificates, and settings—with little to no downtime when performed correctly.
In this complete 2026 guide, you’ll learn how to migrate cPanel accounts between servers safely, efficiently, and without disrupting your website visitors.
Why Migrate cPanel Accounts?
Organizations migrate hosting accounts for many reasons. Common scenarios include:
- Upgrading to a faster VPS
- Moving from shared hosting to VPS hosting
- Migrating to dedicated servers
- Changing hosting providers
- Upgrading hardware
- Moving to NVMe storage
- Improving security
- Consolidating multiple servers
- Relocating workloads to different regions
A successful migration preserves:
- Website files
- Databases
- Email accounts
- DNS records
- SSL certificates
- Cron jobs
- User settings
- Application configurations
Understanding Downtime During Migration
Downtime usually occurs when DNS records point visitors to a server that no longer contains the latest website data. Common causes include:
- DNS propagation delays
- Incorrect DNS updates
- Incomplete account transfers
- Database synchronization issues
- Email configuration mistakes
- SSL certificate problems
The goal of a professional migration is to ensure both servers remain operational until all traffic has successfully moved to the new environment.
Pre-Migration Checklist
Before migrating any cPanel account, complete the following preparations.
Verify Source Server Access
Ensure you have:
- Root access
- WHM access
- SSH access
- Backup permissions
Verify Destination Server
Confirm:
- cPanel is installed
- WHM is functional
- Adequate storage exists
- Sufficient RAM is available
- Compatible PHP versions are installed
Create Full Backups
Never migrate without backups. Generate a full account backup through: WHM:
Backup > Generate Full Backup
Or via SSH:
/scripts/pkgacct username
Store backups on an external location whenever possible.
Check Software Compatibility
Review:
- PHP versions
- MySQL versions
- MariaDB versions
- Apache configurations
- LiteSpeed configurations
- Application requirements
Compatibility issues are one of the most common causes of migration failures.
Lower DNS TTL Before Migration
Reducing DNS TTL significantly minimizes downtime. Locate your DNS zone and change:
86400
to:
300
or:
600
Do this at least 24 hours before migration. Benefits include:
- Faster DNS propagation
- Faster traffic switching
- Reduced downtime risk
Migration Method 1: WHM Transfer Tool
The easiest and most reliable migration method is the built-in WHM Transfer Tool. Navigate to:
WHM > Transfers > Transfer Tool
Enter:
- Source server IP
- Root credentials
- SSH port
WHM will automatically:
- Discover accounts
- Package data
- Transfer files
- Restore accounts
- Rebuild configurations
This method is recommended for most migrations.
Migration Method 2: Account Backup Restoration
Create a backup on the source server:
/scripts/pkgacct username
Transfer backup:
scp cpmove-username.tar.gz root@newserver:/home
Restore account:
/scripts/restorepkg username
This approach is ideal for individual account migrations.
Migration Method 3: Manual Migration
Advanced administrators may prefer manual transfers. Components include:
- Website files
- Databases
- Email accounts
- DNS zones
- SSL certificates
Manual migration provides maximum flexibility but requires significantly more expertise.
Migrating Website Files
Website content is usually located in:
/home/username/public_html
Transfer files using:
rsync -avz /home/username/public_html root@newserver:/home/username/
Benefits of rsync:
- Fast
- Incremental
- Reliable
- Efficient for large websites
Migrating Databases
Export database:
mysqldump -u root -p database_name > database.sql
Transfer:
scp database.sql root@newserver:/root/
Import:
mysql -u root -p database_name < database.sql
Verify database connectivity after migration.
Migrating Email Accounts
Email migration is often overlooked. Transfer:
- Mailboxes
- Passwords
- Filters
- Forwarders
- Autoresponders
When using WHM Transfer Tool, email data is automatically migrated. Verify:
- Webmail access
- SMTP functionality
- IMAP functionality
- POP3 functionality
before updating DNS.
Migrating SSL Certificates
Most modern websites use SSL certificates. Verify that:
- Certificates exist
- Private keys transfer correctly
- Intermediate certificates are installed
If using AutoSSL, force a renewal after migration. Check:
WHM > SSL/TLS Status
to confirm successful installation.
Testing the Website Before DNS Changes
Never update DNS before testing. Modify your local hosts file. Windows:
C:WindowsSystem32driversetchosts
Linux:
/etc/hosts
Add:
NEW_SERVER_IP example.com
This allows you to view the website on the new server before visitors do. Test:
- Website functionality
- Database connections
- SSL certificates
- Contact forms
- Login systems
- Shopping carts
- APIs
Synchronizing Dynamic Data
For active websites, data may continue changing during migration. Examples include:
- Orders
- Comments
- User registrations
- Emails
- CRM records
Perform a final synchronization using:
rsync -avz --delete source destination
This ensures the latest changes are copied before DNS updates.
Updating DNS Records
Once testing is complete: Update:
A Records
to point to the new server IP. Example: Old:
192.0.2.10
New:
203.0.113.25
Because TTL was reduced earlier, changes should propagate quickly.
Monitoring DNS Propagation
Check propagation using:
dig example.com
or:
nslookup example.com
Verify that traffic gradually moves toward the new server.
Monitoring Server Logs
After migration, monitor: Apache:
/usr/local/apache/logs/error_log
NGINX:
/var/log/nginx/error.log
PHP:
/var/log/php-fpm/error.log
Watch for:
- Missing files
- Database errors
- Permission issues
- SSL warnings
Common Migration Problems
Database Connection Errors
Usually caused by:
- Incorrect credentials
- Missing users
- Configuration mismatches
Verify:
wp-config.php
or application configuration files.
Email Delivery Issues
Check:
- MX records
- SPF records
- DKIM records
- Reverse DNS
SSL Warnings
Reinstall certificates or regenerate AutoSSL certificates.
Permission Errors
Correct ownership:
chown -R username:username /home/username/public_html
Best Practices for Zero-Downtime Migrations
Reduce TTL Early
At least 24 hours before migration.
Keep Both Servers Online
Never shut down the old server immediately. Maintain both servers for:
- 48–72 hours
- DNS propagation completion
- Traffic validation
Test Everything
Validate:
- Websites
- Databases
- SSL
- APIs
before DNS changes.
Use Incremental Syncs
Rsync minimizes data differences and shortens migration windows.
Schedule During Low Traffic Hours
Perform final cutovers during:
- Late night
- Early morning
- Weekend maintenance windows
Why VPS Hosting Simplifies cPanel Migrations
Modern VPS environments provide significant advantages during migrations. Benefits include:
- Root access
- Faster transfers
- Dedicated resources
- Better control
- Flexible networking
- Snapshot capabilities
NVMe-powered VPS hosting further reduces migration time by accelerating file transfers and database operations.
When to Consider Professional Migration Services
For mission-critical websites, professional migration services can eliminate risk. Ideal candidates include:
- WooCommerce stores
- Large cPanel resellers
- SaaS platforms
- Enterprise websites
- High-traffic portals
Professional migrations often include:
- Full planning
- Data verification
- DNS management
- Post-migration testing
- Downtime prevention
Frequently Asked Questions
Can cPanel migrations be completed without downtime?
Yes. Proper DNS planning, synchronization, and testing can result in little to no visible downtime.
How long does a cPanel migration take?
Small websites may migrate in minutes, while large accounts with extensive email and database content can require several hours.
Does email stop working during migration?
Not if DNS and mail services are configured correctly and both servers remain active during propagation.
Can WHM migrate multiple accounts simultaneously?
Yes. The WHM Transfer Tool supports bulk migrations from another cPanel server.
Should I keep the old server online?
Absolutely. Keeping the source server active for at least 48–72 hours prevents service interruptions during DNS propagation.
Conclusion
Migrating cPanel accounts between servers does not have to involve downtime, lost emails, broken websites, or frustrated users. By preparing properly, reducing DNS TTL values, using WHM’s Transfer Tool, synchronizing data carefully, and validating functionality before updating DNS records, administrators can achieve seamless migrations with minimal risk. Whether you’re moving to a faster VPS, upgrading infrastructure, or changing hosting providers, following a structured migration strategy ensures a smooth transition while maintaining website availability and protecting your business operations throughout the process.
Looking for fast, secure hosting?
Visit UK Speed for cloud servers, VPS NVMe, and dedicated hosting tailored for performance.